This article will walk you through how to configure Stripe to send webhooks to Parsey in order to integrate with your CRM.
The difficulty with integrating Stripe is that their webhooks contain information only related to the type of event that the webhook is configured for. For example, if you have Stripe send a webhook for a one-off order, it will only show information related to the order, and will not have any of the customers information. However, they do send a Stripe Customer ID that we can use to identify customers.
Step 1: Export Stripe Customers
In order to have the CustomerID inside Infusionsoft, you will need to export your customers from Stripe and import them to your Infusionsoft using Parsey's Attachment flow.
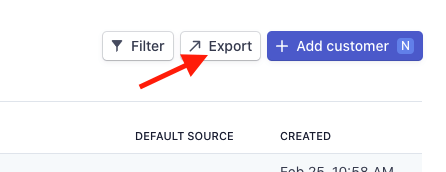
Inside Stripe, navigate to Customers and click Export.
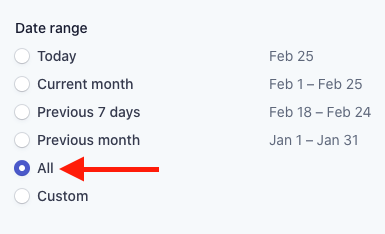
Click All for the date range.
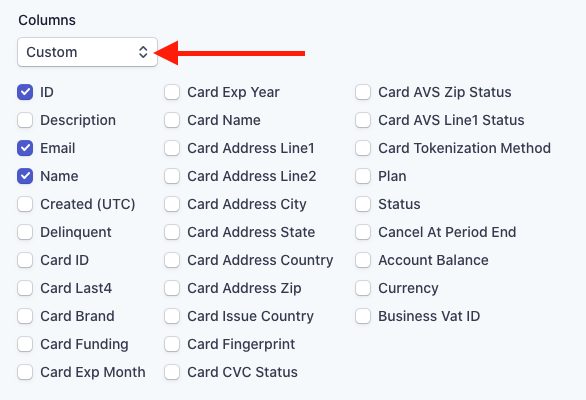
For the Columns drop-down, select Custom, and then make sure only ID, Email, and Name are selected.
Now you can click the export button. Download the export to your computer.
Step 2: Create an Attachment Flow
Create the Mailbox and Flow
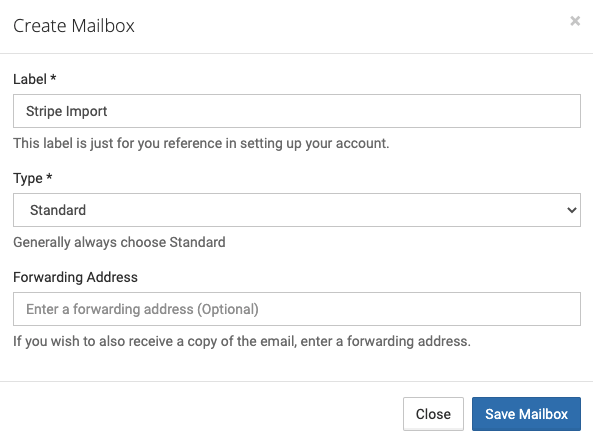
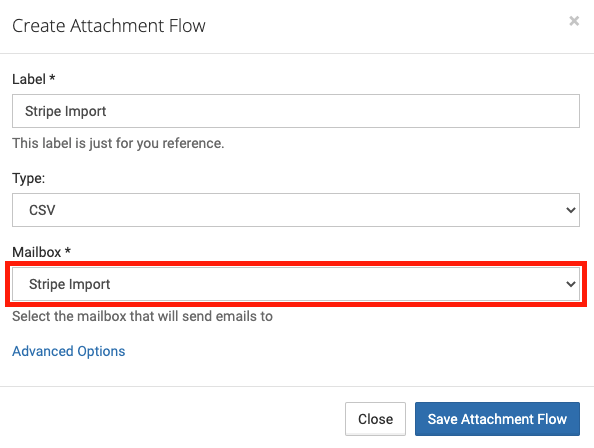
Log into Parsey and go to Attachment Flows. Create a new Mailbox called Stripe Import and click Save Mailbox.
Now click Create Attachment Flow. Name it Stripe Import as well, and set the mailbox to Stripe Import. Click Save Attachment Flow.
Now you will need to Copy the email address of the Stripe Import mailbox we just created and send an email with the export attached to it.

Configure the Attachment Flow
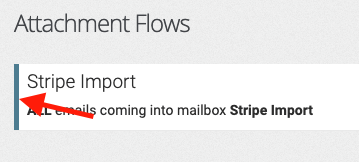
Once the Flow has received the email with the export attached to it, it is ready to be configured and will be blue.
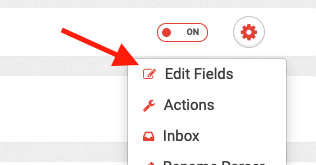
Click the gear icon on the Flow and select Edit Parser Fields.
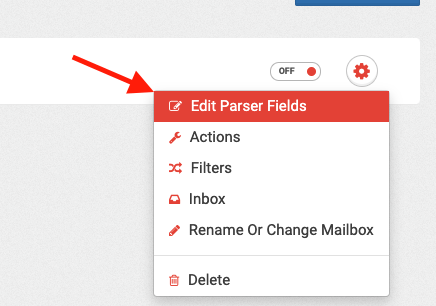
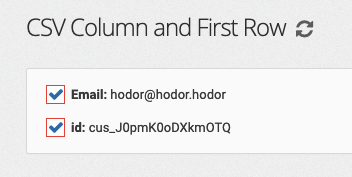
Click the Email, id, and Name checkboxes (I forgot to add Name to my export).
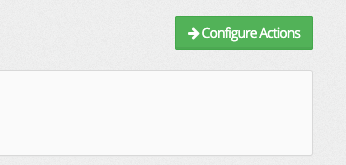
Click Configure Actions on the right.
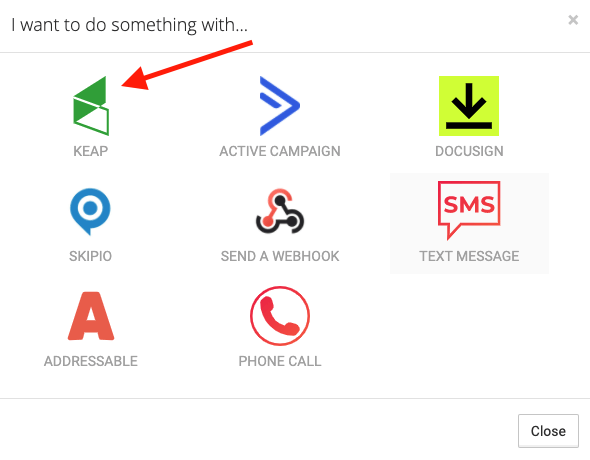
Select and connect to Keap.
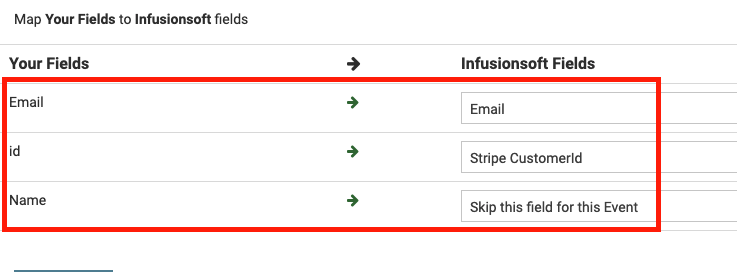
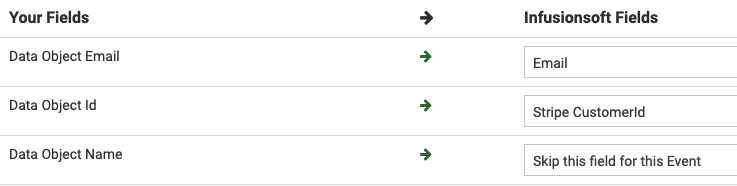
Map the Email field to the Email field in Infusionsoft and the id field to the custom field you created in Infusionsoft for the Stripe CustomerId. Skip the Name field for now.
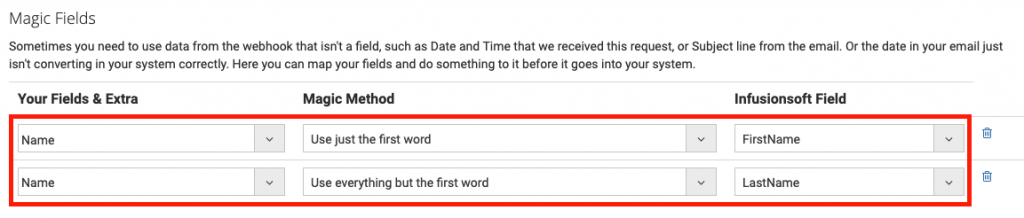
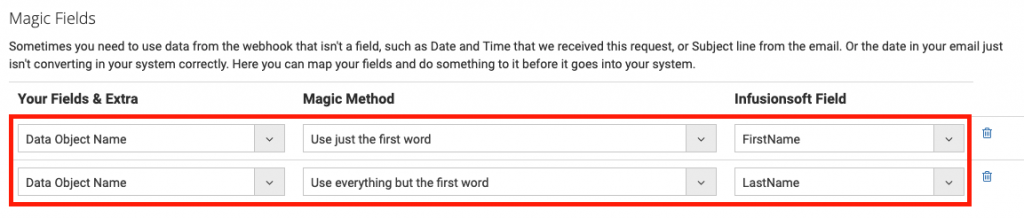
Click the Magic Fields tab, and add two magic fields like this one.
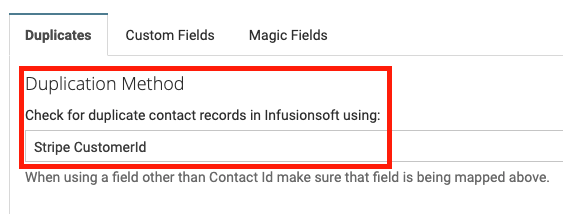
Head to the Duplicates tab. Leave the duplication method to Email Address, and click Save.

Click Back to Actions at the top of the page and turn the Keap action to ON.

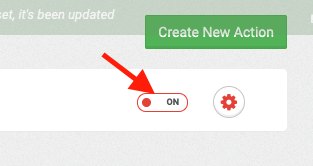
Go back to Attachment Flows and turn the Stripe Import flow to ON.
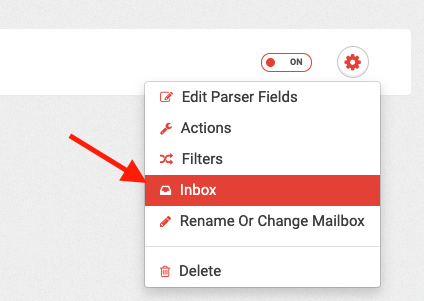
Now you will need to go into the Stripe Import mailbox and re-process the email that you sent earlier.
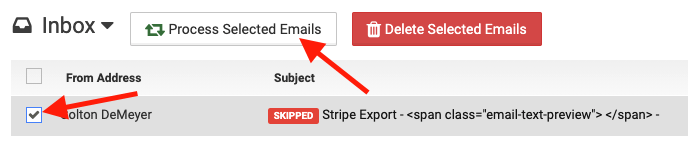
The contacts will be added to Infusionsoft as the CSV is processed, which could take up to an hour depending on how many rows are on the CSV.
The important thing is that the Stripe CustomerId is being added to the existing contacts based on the email address of the customer.
Step 3: Webhook Flows
There are many different webhooks that Stripe can send based on actions in Stripe.
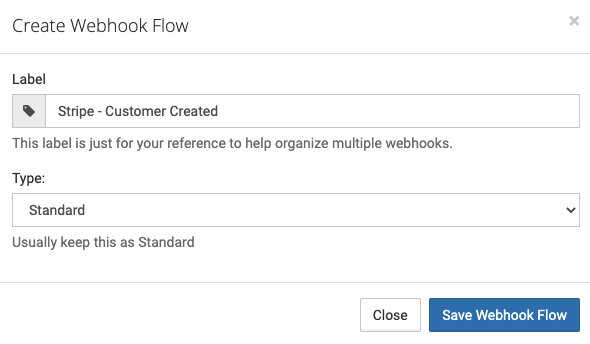
Customer Created (Essential)
Inside Parsey, go to Webhook Flows and create a New Webhook Flow. Label it Stripe - Customer Created. Then save the webhook flow.
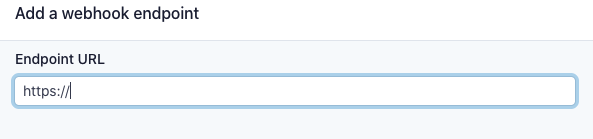
Copy the URL for that flow and head over to Stripe.

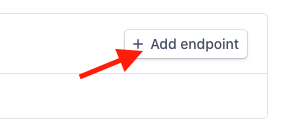
Inside Stripe, go to Developers >> Webhooks.

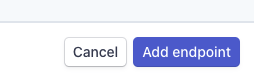
Click the Add Endpoint button.
Paste the Parsey URL you copied earlier into the Endpoint URL field.
In the description type Customer Created.
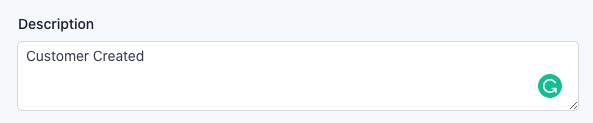
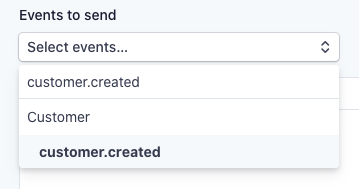
In the Events drop-down, select customer.created.
Click the Add Endpoint button.
Now click the Send Test Webhook button and follow the prompts to send a test.

Now go back to the Parsey webhook flows and edit the fields of the Stripe - Customer Created flow.
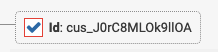
Select the Id, Email, and Name (from the Metadata section) fields. You can also select any other fields you wish to send to Infusionsoft as well.

Click Configure Actions at the top of the page and select Keap.

Now map the Id and Email fields to the corresponding fields in Infusionsoft (don't do the name field just yet).
Under the Duplication Method section, select the Stripe CustomerId field.
Now head to the Magic Fields tab. We need to split the Name of the customer into First and Last Name.
Add 2 Magic Fields that look like this:
Now click Save Contact.

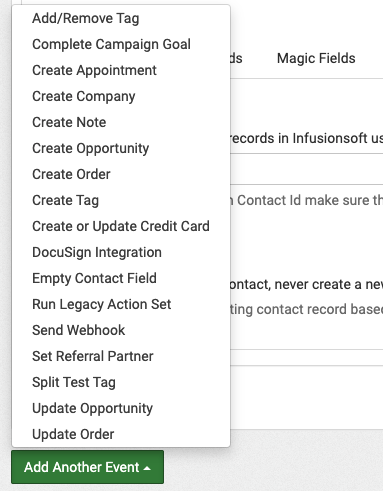
A green button will appear that allows you to configure other events. I won't cover those here, but they are there if you want to do other things in Infusionsoft.
At the top of the page, click Back to Actions and turn the Keap action to ON.


Now new contacts added to Stripe will be automatically added to Infusionsoft.
Repeat Step 3 for any other Stripe events you want. Here is a list of all Events and what they do: https://stripe.com/docs/api/events/types
Congratulations, you have now learned how to integrate Stripe with Infusionsoft.
Visit https://parsey.com/docs/integrations/ for articles on how to set up our other integrations.