This article will help you understand how to configure and set up your RightSignature Parsey Integration.
Step 1: Infusionsoft
Create Custom Fields or Tags


To get started, you will want to create either two Custom Fields, or two Tags inside Infusionsoft. You will need to label them Document Viewed and Document Signed. We will leave these alone for now.
Create and Configure the RightSignature Campaign
Create a new Campaign.

Drag the Other campaign goal onto the canvas.

Change the Goal Settings by double-clicking the tag icon on the goal. Set it to API call is made.

Configure the API by double-clicking the goal. Give it a Call Name. We recommend using docviewed. Hit "Save".


Drag a sequence onto the canvas. This will be your delay sequence. Double-click the blue flag to enter the "Sequence Settings". Select the "Runs until completed" radio button and hit "Save".

Enter the Delay Sequence to configure it. Drag a Delay Timer onto the canvas and double-click it to set it.

Now you will need to connect your Delay Sequence to two other sequences. The top Sequence will be labeled Did NOT Sign Doc - Reminder Sequence. The Bottom one will be labeled Signed Doc - Fulfillment Sequence. When you connect the two sequences to your delay sequence, a decision diamond or "node" will appear. Double-Click the node to configure the rules for the decision.

This is how you should configure the rules. You will notice that both of these sequences are dependent on whether or not the Signed Document field or your Signed Document tags have been applied to the contact record.
Did NOT Sign Doc - Reminder Sequence

Your Reminder Sequence can have any content that you prefer. We have configured ours to send a reminder email, a text through Parsey, and a phone call through Parsey with a 24 hour interval between each one.


Now you will need to drag another Other goal onto the canvas and connect it to the Did NOT Sign Doc - Reminder Sequence. Configured it for when an API call is made. Give it a call name similar to this. This step doesn't make sense right now but It will soon, I promise.
Signed Doc - Fulfillment Sequence

Inside our Signed Doc - Fulfillment Sequence we just have a Thank You email that the contact will receive after they sign the document.
Once you have everything configured up to this step you can safely remove everything from draft mode and publish the campaign.
Step 2: Configuring Parsey
Log into your Parsey account. If you do not have one yet, you can sign up for a free account here. Then you will need to go to your Email Parsers page. If this is your first Mailbox you should read over our article Creating a Mailbox.

Name your Mailbox RightSignature. Copy the Parsey.com email address that was generated when you created the mailbox. You will need to change your RightSignature account email address to this one in order for Parsey to receive the emails from RightSignature.

You'll notice that when you created your RightSignature Mailbox it will also create a RightSignature Parser. Right away your Parser will have a yellow tag that says WAITING. This means that Parsey is waiting to receive an email from RightSignature. In order to continue the setup, you have to wait for that email.

Once an email goes into the RightSignature mailbox, your RightSignature Parser can now be configured.
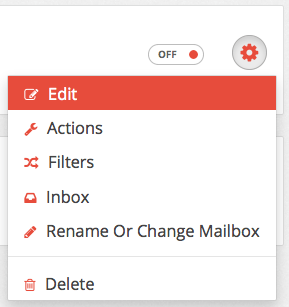
To configure the Parser, click on the gear icon and select "Edit" from the drop down menu.
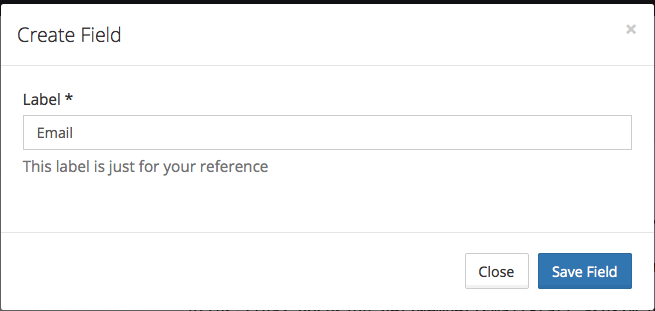
Create a new field and label it Email. Then Click "Save Field".

Configure the Extraction by clicking the "? Empty" button.
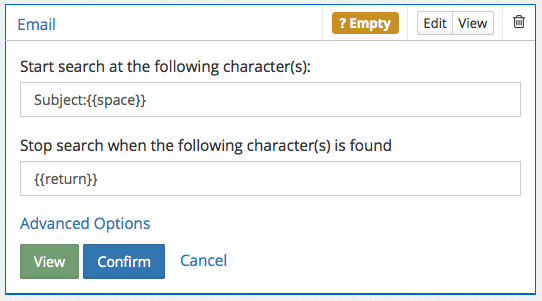
Edit the Start search at the following character(s): to Subject:{{space}}. Change Stop search when the following character(s) is found to {{return}}.

Now click the "Configure Actions" button on the top right hand side of the screen.

Click "Create New Action". From here you will need to connect your Infusionsoft account to Parsey. If you would like more instruction on how to do that, take a look at our article Connecting to Your CRM.

From here you will need to map your Email field to your Infusionsoft Email field. This is how Parsey will update the existing Infusionsoft Contact Record.

Now click "Advanced Field Options". From there, enter Yes in the Custom Value field and select "Viewed Document" from the drop down. The click "Save Contact Settings".
Click the green "Add Another Event" button at the bottom of the screen. From the drop down, select "Complete Campaign Goal".
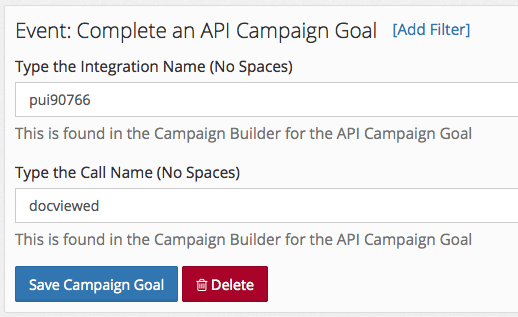
Enter your Infusionsoft App Name and the Call Name from the first goal in your RightSignature campaign. Then click "Save Campaign Goal".

Now click "Actions" from the path at the top of the page.

Click "Rename" and call this action Viewed Document. Save it and then click "Filters".

Configure the filter EXACTLY as you see it here. Keep in mind that the last field is case-sensitive. Then click "Finished".

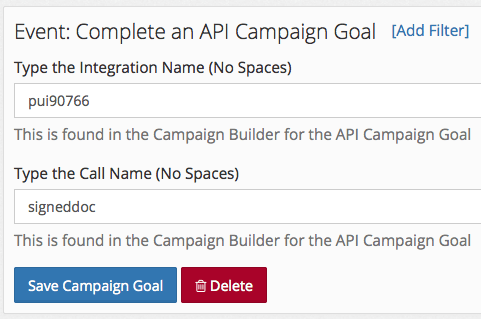
Now create a new action. Configure it exactly the same as the one before except the Infusionsoft field that Yes will go into will need to be changed to Signed Document and the call name for the Complete an API Campaign Goal will now be signeddoc. You may recognize this from earlier in the campaign builder as the Call Name after the Did NOT Sign Doc - Reminder Sequence.

Rename this action Signed Document and configure the filter to match this one exactly.

Once you are done with that set both of those actions to ON. Then go back to the Email Parsers page.
Now all you have to do is set the RightSignatureParser to ON and you are done with the Parsey Configuration.
Step 3: Sending a RightSignature Document

After the initial setup, there is only one extra step that you will have to repeat every time you send a document. That step is to add the signers email address to the Description field that you have the option of editing before you send an email. This step is ESSENTIAL for the RightSignature integration to work. If this step is not taken then Parsey CANNOT update the contact record inside Infusionsoft.
Once you have done that then you are finished! Congratulations!