
If you receive email in your Gmail inbox and need them forwarded to a different email, the process is quite simple.
There are many reasons people might automatically forward an email, but usually they are business related or some other sort of transnational email.
For example, you may have new real estate leads sent to your gmail address but need them sent to your CRM instead. Or you might get notifications of new e-commerce orders but you need them added to your fulfillment software. Lastly, you might want to auto-forward monthly credit card statements to your accounts payable department.
Here are the 3 steps to automatically forward emails that come to your Gmail inbox.
3 Easy Steps
**NOTE: You will need access to the destination address being used for automatic forwarding. Gmail requires you to verify you have access to this email address and will send you a verification code to this address.
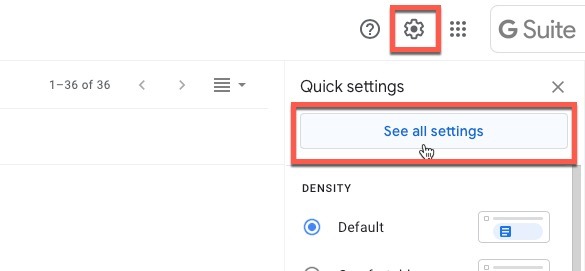
- Go to the Forwarding Settings
Click the upper right gear icon to go to settings. If you see a side-pane with quick-access settings, click the “See all settings” to go to all of your settings in Gmail.
Once you are inside of your Gmail settings, click the Forwarding & POP/IMAP Tab.
- Add a new forwarding address
Forwarding is the first section of the Forwarding & POP/IMAP tab. Click “Add a forwarding address” and enter the email address you need emails to be forwarded to.
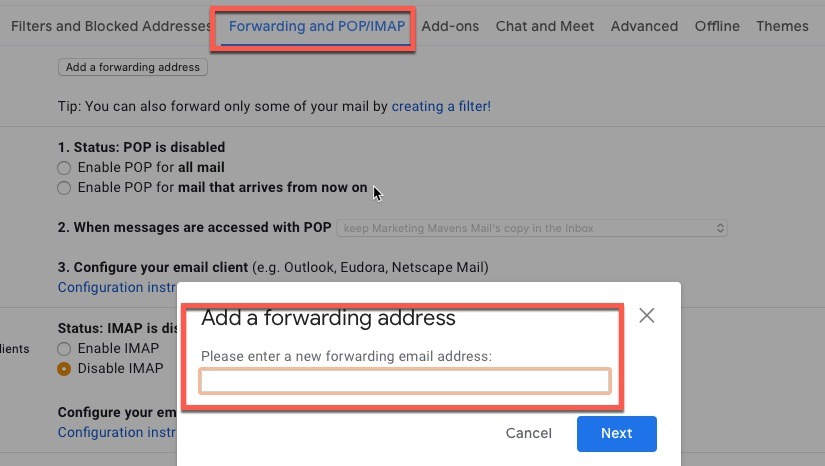
You will be shown a confirmation window to approve a verification email to be sent to this address. Click Proceed to allow it.
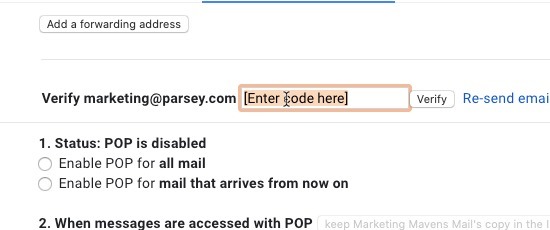
- Verify the email address.
You will get an email from Google with the confirmation code you need to verify you have access to the inbox. If you do not have direct access to the inbox but a team member or partner does, just ask them to send you the code. No direct click is required.
Additional Forwarding Options
If you need to only forward specific emails, such as email from a specific email address or with a specific subject line, you’ll need to add a filter.
Add A Filter
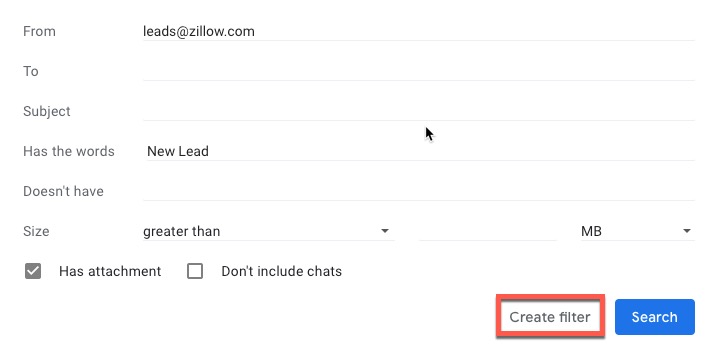
You can filter emails you want to forward by the From address, To address, Subject line, or specific words within the email body. You can also filter whether it has an attachment (and the size).
There are 3 ways to add a filter to your forwarding emails: Using the search menu, within the Settings > Filters and Blocked Accounts, or within the Settings > Forwarding and POP/IMAP tab. Since we’ve done all of the work thus far under the Forwarding tab, we’ll use that option.
To add a filter to emails being forwarded, click “Create a filter!”. Next, add the criteria needed to properly filter which emails should be sent to your destination.

TIP: It might be a good idea to run a search prior to creating your filter and make sure the criteria you have selected produces the desired results.
Once you hit “Create Filter,” you will be taken to a popup that will help you decide what Gmail should do with the email (e.g. Archive it, delete it, mark it as important). Note: make sure you select “Forward it to: ____”
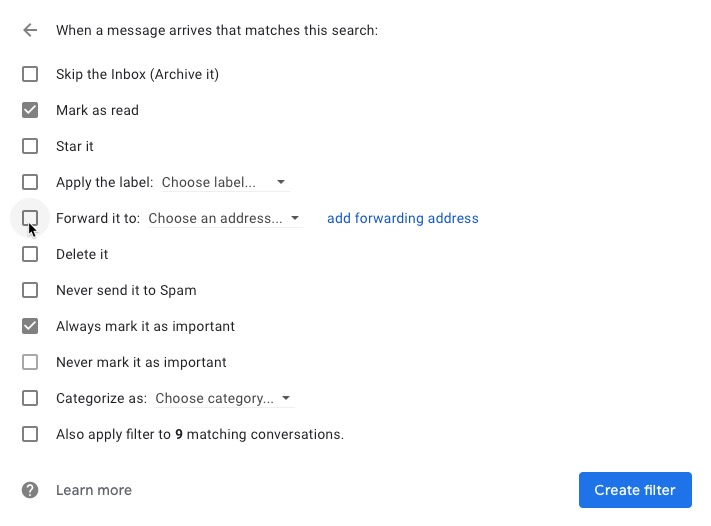
TIP: On this same window, you can select to forward the emails currently in the inbox that fit your filter’s criteria.

Forward to Multiple Accounts
Gmail only allows you to forward all of your incoming emails to a single destination email address. You can change which destination email address is used by going to Settings > Forwarding and POP/IMAP > Forwarding > and select the chosen destination from the dropdown.
However, you can use a filter to forward specific emails to a second email address. To do that, follow the same steps under the Add A Filter section of this blog post and select the needed destination email address.
Sending Your Emails to Parsey
Parsey is the leading email parser used by businesses of all sizes to parse their transactional email. An email parser is a tool that extracts specific data out of an email and puts it into another platform, such as a CRM or marketing automation tool. Here are a few examples of how Parsey is used:
- A car dealer receives an email with lead from dealer.com, Parsey takes the data out of that email and put it into their MailChimp account.
- A real estate agent receives an email from Zillow.com, Parsey extracts the name, phone number, and email address of that lead and adds it to their CRM.
- An e-commerce store gets an email from their custom build shopping cart, Parsey will put the order information (customer name, product info, shipping address) into their fulfillment software.
To forward emails from your Gmail inbox to Parsey, click Email Flows, and then create an inbox. You will be given a unique email address that you will enter into your Gmail forwarding settings as the destination email address.
Use this tutorial to finish setting up the automation inside of Parsey.
If you don’t have a Parsey account, create a free account here. The free plan will allow you to run 100 free actions.