
If you receive email in your iCloud (Apple) inbox and need them automatically forwarded to a different email address, the process is quite simple.
There are many reasons people might automatically forward an email, but usually they are business related or some other sort of transnational email.
For example, you may have new real estate leads sent to your gmail address but need them sent to your CRM instead. Or you might get notifications of new e-commerce orders but you need them added to your fulfillment software. Lastly, you might want to auto-forward monthly credit card statements to your accounts payable department.
Here are the 2 steps to automatically forward emails that come to your iCloud inbox.
2 Easy Steps
iCloud is a very simple email provider with limited settings and options. One of the settings iCloud offers is to forward your incoming emails to a single destination email address. You can also do this within Apple's email client, Mail, but configuring it within iCloud allows you to do it to the actual server instead of the email client. To forward all of your email, follow these 2 simple steps.
- Go the your iCloud Mail Settings
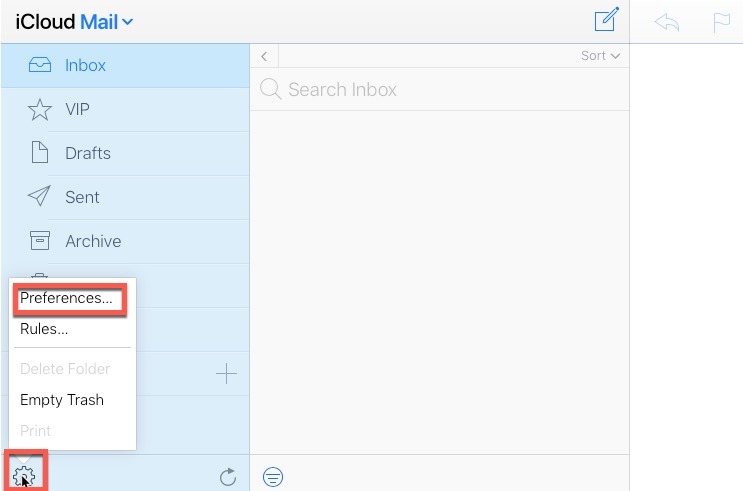
Log into your account at iCloud.com and click the gear icon in the lower left corner of the browser. When prompted, click Preferences. This will take you to the settings page with the option to enter your destination email address.
- Enable Email Forwarding
The middle section of the General settings teb includes the Forwarding settings. Check the box “Forward my email to:” and enter the destination email address.

*NOTE: You can select to have all forwarded emails deleted. However, this current option does not allow you to filter which emails are forwarded. Selecting to delete these messages will forward and delete all the emails sent to your inbox. For
Additional Forwarding Options
Similarly to Gmail and some other email providers, iCloud offers a way to forward emails to additional email addresses or only forward certain emails based on filters.
Parsey can handle the email filters to make sure only specific emails are being parsed for your business use. To create a filter inside of Parsey, follow this tutorial.
Add A Filter
In order to forward specific emails to your preferred email address, select the Rules tab in the settings menu.
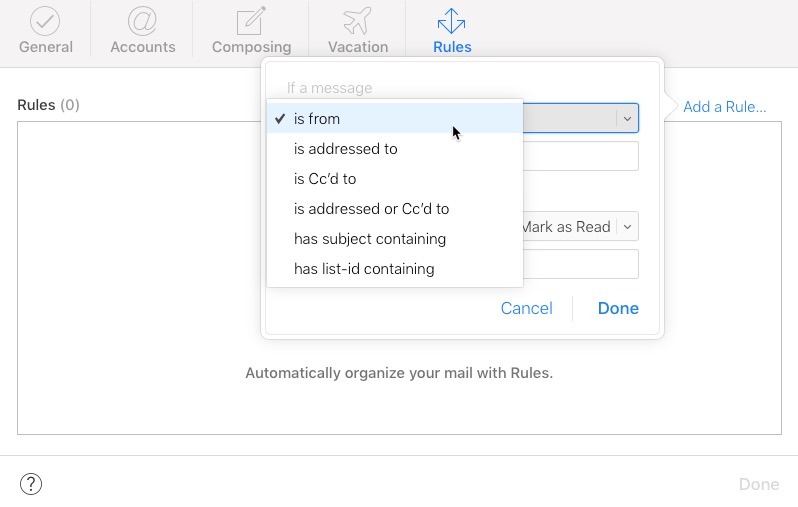
Determine your filtering criteria. You can select between teh following filters:
- Is from (sender)
- Is address to (recipient)
- Is Cc’d to (Cc’d recipient)
- Is address or Cc’d to (broader recipient option)
- Has subject containing
- Has list-id containing (WFT is a list-id?)
Once you have selected this criteria, select Then “Forward to an Email Address and Mark as Read.” Enter your destination email address.
TIP: If you want this email removed after forwarded, set up a similar rule and select to have the email moved to trash.
Sending Your Emails to Parsey
Parsey is the leading email parser used by businesses of all sizes to parse their transactional email. An email parser is a tool that extracts specific data out of an email and puts it into another platform, such as a CRM or marketing automation tool. Here are a few examples of how Parsey is used:
- A car dealer receives an email with lead from dealer.com, Parsey takes the data out of that email and put it into their MailChimp account.
- A real estate agent receives an email from Zillow.com, Parsey extracts the name, phone number, and email address of that lead and adds it to their CRM.
- An e-commerce store gets an email from their custom build shopping cart, Parsey will put the order information (customer name, product info, shipping address) into their fulfillment software.
To forward emails from your iCloud inbox to Parsey, click Email Flows, and then create an inbox. You will be given a unique email address that you will enter into your Gmail forwarding settings as the destination email address.
Use these tutorials to finish setting up the automation inside of Parsey.
If you don’t have a Parsey account, create a free account here. The free plan will allow you to run 100 free actions.