
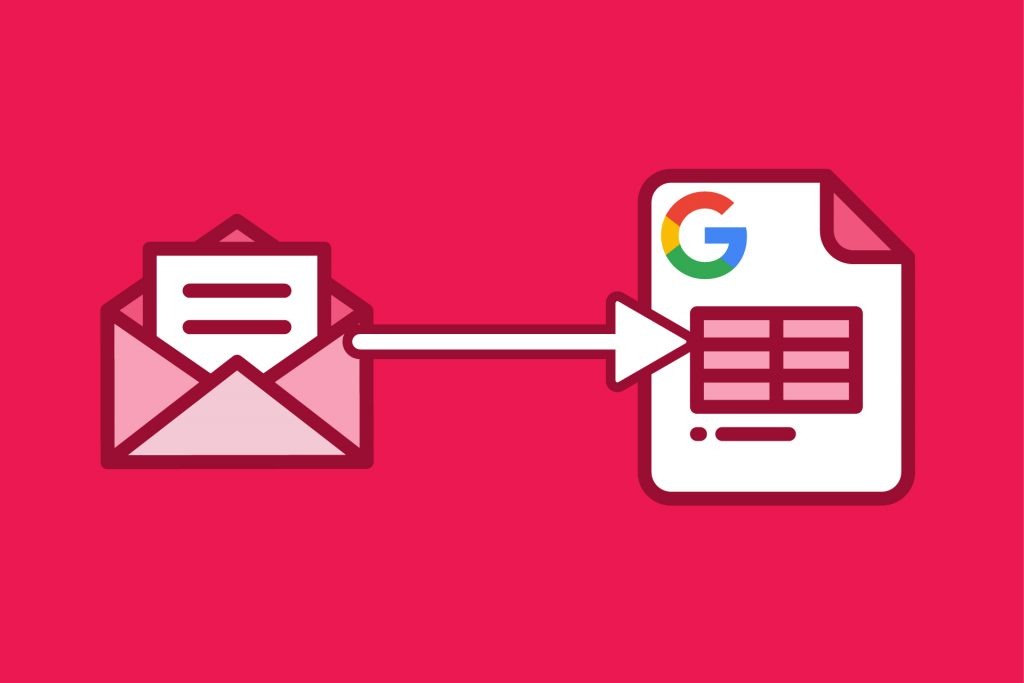
We’re on a quest to put an end to mind-numbing (not to mention error-laden) data entry. Today’s topic is adding transactional email data to Google Sheets.
What is a transactional email? Anything that sends you an email notification with data from an event that took place. Common examples include new internet leads, online purchases, and appointment requests.
If you ever need this information input into a Google Sheet, this step-by-step tutorial is for you.
In order to follow his tutorial, you’ll need a few things handy.
- An email (or webhook) that with the data you need scrapped and put into Google Sheets
- A new Google Form (which connected to a Google Sheet)
- A free Parsey account (https://parsey.com/app/register)
You can also follow similar steps to send webhook data to a Google Sheet. We’ll cover that in a separate tutorial.
Here is a full video tutorial, otherwise follow along below.
Step 1 - Configure Parsey, Part 1
Parsey is going to create a specific inbox for your transactional emails and extract, or parse, the data you need and then send it to your Google Sheet.
First, create a free parsey account. The free account will give you 100 free events and you don’t need to enter a credit card.
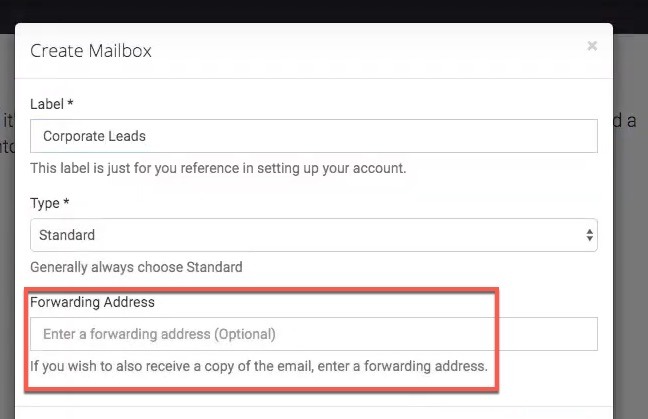
Create Mailbox
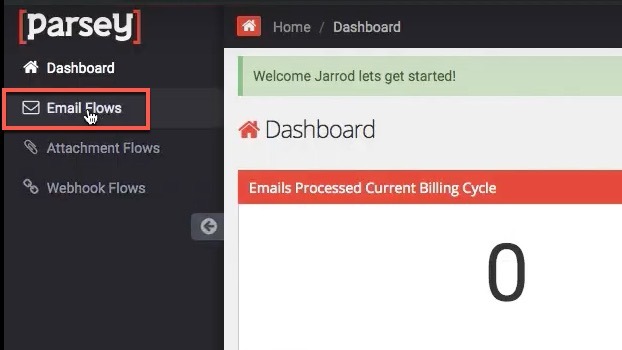
Next, click Email Flows and create a new mailbox.
If you'd like a copy of your transactional email, make sure to add a forwarding email address when you create the inbox.
This next step is going to be different for nearly every business, but it’s really simple. Go into whatever system is sending you the transactional emails and update the settings to send the email directly to your serialized Parsey email address.
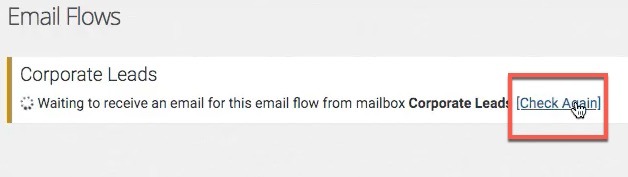
Grab Email Data
Before you can show Parsey how to parse your email, it needs to receive one first. Login to your system and have it send Parsey a test email (or resend a previous email) to the mailbox address you created in the earlier step. Once the email has been sent, click the Check Again link to refresh your inbox.
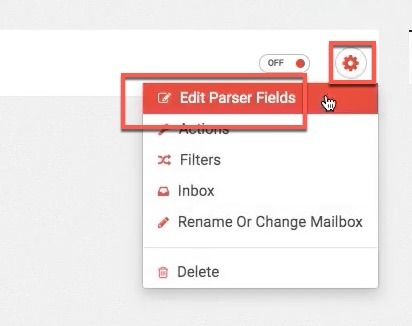
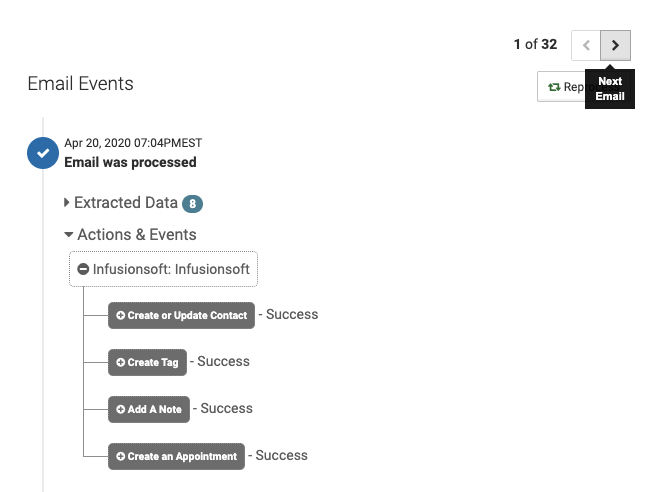
Once Parsey has received your email, click the gear icon and select Edit Parser Fields. You should see your test email and all of its content.
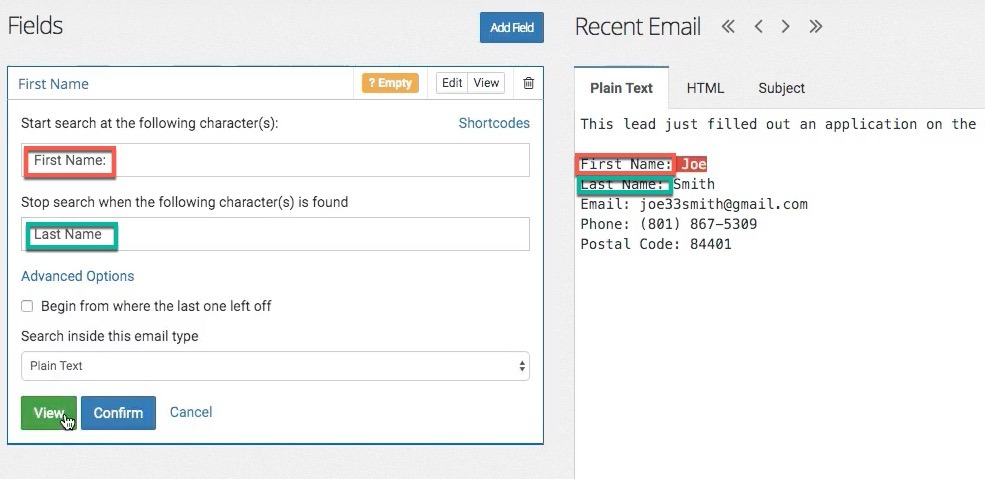
Click the Create Field button and give it an accurate label. Next, tell Parsey where to start and stop searching for a value. Click View to check to make sure it’s accurate. If needed, adjust the start and stop values until you get the correct information.
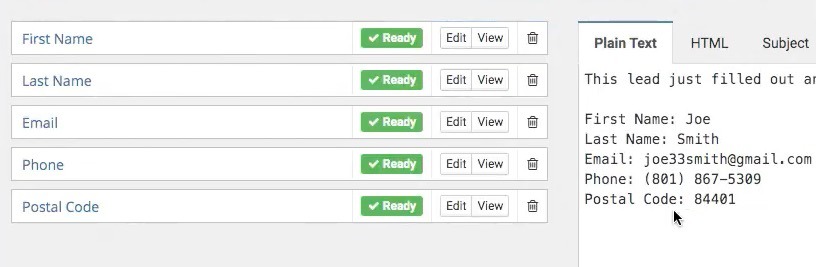
Follow the same process for all the fields you need pulled out of your email. When you are finished, click confirm.
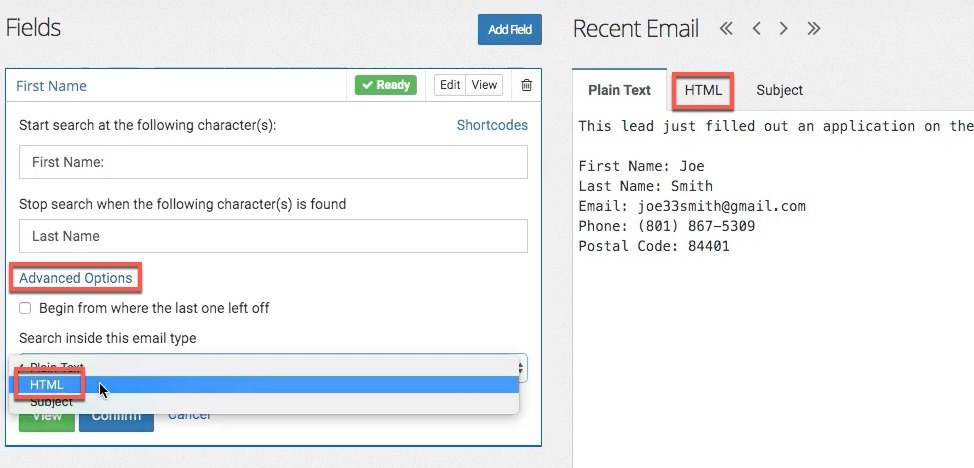
If your email is sent as HTML or you need to pull data out of the subject line, select Advanced Options.
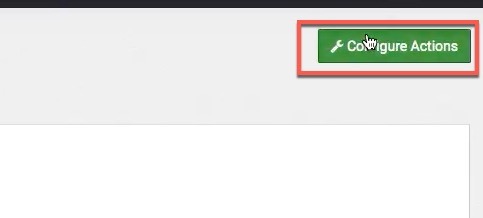
Select Configure Actions in the upper right corner and select Send a Webhook.
We are going to pause this part of the configuration and move onto your Google Form and Google Sheet. Don’t close this tab because you’ll be returning to it in a few minutes.
Step 2 - Configure Google Form
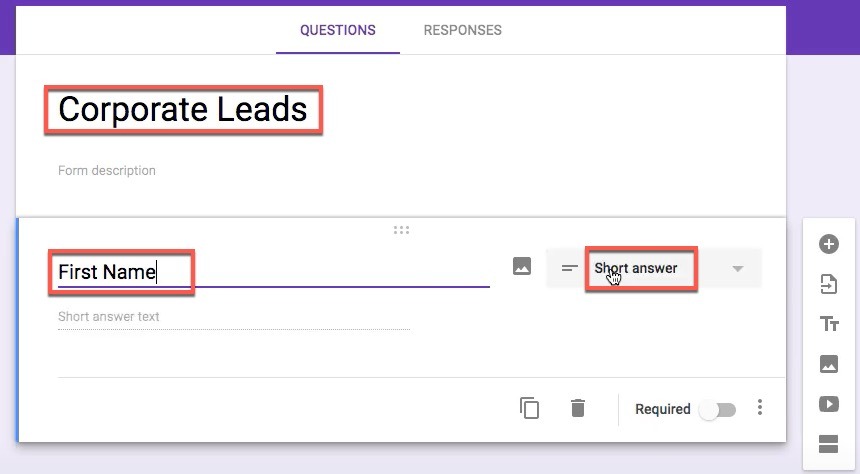
In a new tab, create a Google Form. To create a Google Form, head over to your Google Drive and create a new form from the dropdown menu. You can also visit https://docs.google.com/forms to view your forms or create a new one. Use a form title that will make it easy to find in the future.
Next, add a new field to your Google Form for every field you added to your Parsey inbox. For the field type, use Short Answer. If the data is really long, you can select a Paragraph field type.
Once you have added your fields, click the Responses tab and create a new spreadsheet.
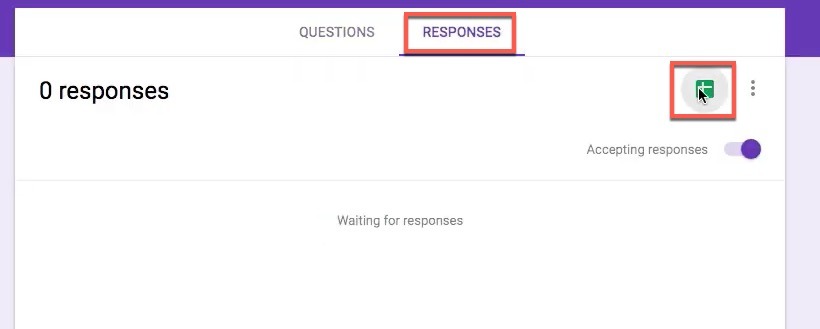
Preview the form and make sure everything looks right. You don’t need to style this because Parsey is sending the data to the form and nobody will ever see it. Fill out the form once with some test data and make sure that data is populated in the Google Sheet you just created.

Find Form Action Code
Now we need to dig into the form code and find the URL for our Parsey webhook. This is much easier than it may seem.
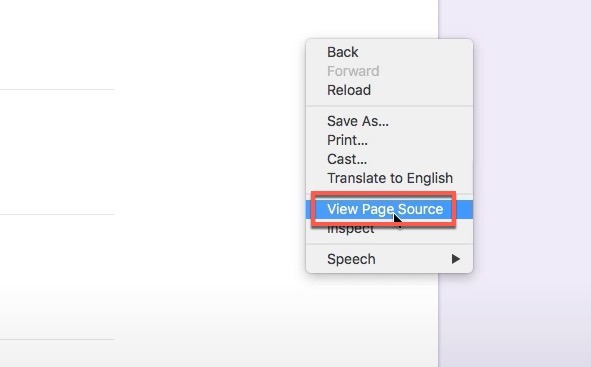
While viewing the public view of your Google Form, click to see the page code. There are a lot of ways to do this. An easy way to do this (if using Google Chrome as your web browser) is to right-click and select View Page Source. You may need to do a quick Google search for your specific computer and browser.
You should now see a page full of web code. Don’t worry, this is much easier than finding a needle in a haystack. Simply hit control-f (windows) or command-f (mac) and search for snippet “form-action”. This should only return a single value. Copy the URL that follows. Note: don’t include the snippet “form-action” or the surrounding parentheses, just the URL. This is the destination URL we will use inside of Parsey. We’ll call it Destination URL in the rest of this post.
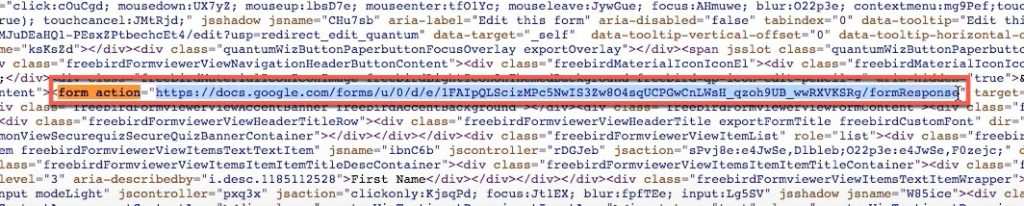
Paste this URL into some sort of plain text editor, such as Notepad (Windows) or TextEdit (Mac) for future reference.
Find Form Entry IDs
Now that we have the form URL, we need to get the IDs that are attached to each Google Form field. To do that, we need to get a pre-filled form link.
Click the ellipses in the upper right and select Get pre-filled link.
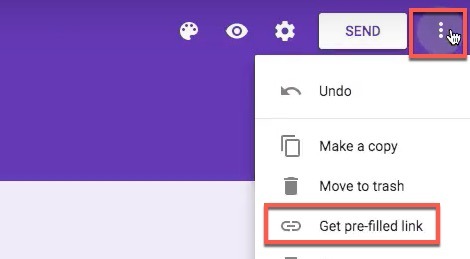
Fill out the form and make the values the same as the field labels (for First Name, enter “First name”). This will help you reference the correct fields when you map the Entry ID to the Parsey fields. After you have filled out your form, click Get Link. When prompted, click the Copy Link button to copy the URL. Paste this URL into the same text edit file as your Destination URL.
This next part is a bit tricky. We need to break that pre-filled link into two parts: URL and entry ID parameters.
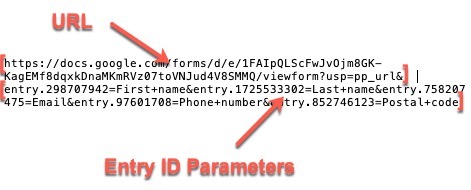
First delete the URL section, which is everything from “https…” to the first “&”. It looks something like this:

Next, delete all of the “&” symbols.

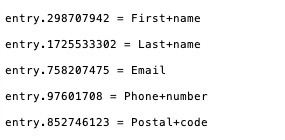
Lastly, separate the entry ID, “=” symbol, and value and add each set to their own line. You should have something like this:
Now that you have the Destination URL and your Entry IDs, let’s move back to the Parsey configuration.
Step 4 - Configure Parsey Part 2
You should be on the Send a Webhook edit action screen. This is where we will enter all the data on your text edit file.
Enter your Destination URL into the field labeled “URL to Send Webhook.”
Next, we need to match the entry IDs from our Google Form to the fields we created from our parsed email.
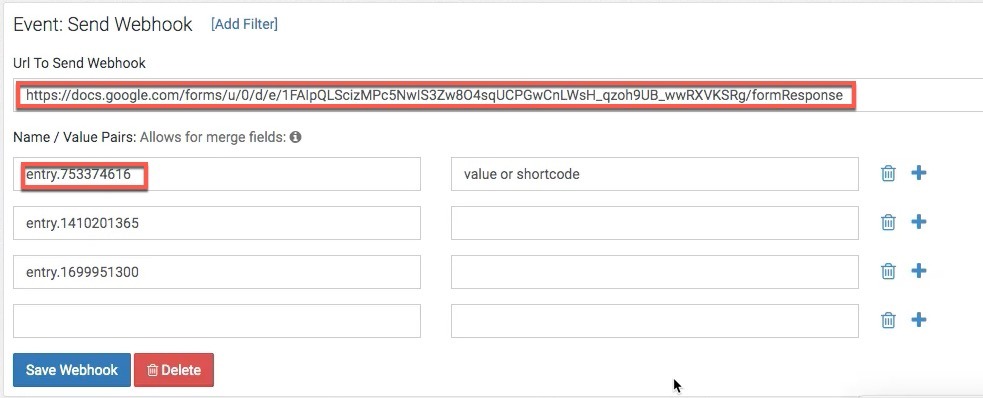
Add your Entry ID to fieldName field. Click the + symbol to add a new line for each Entry ID.
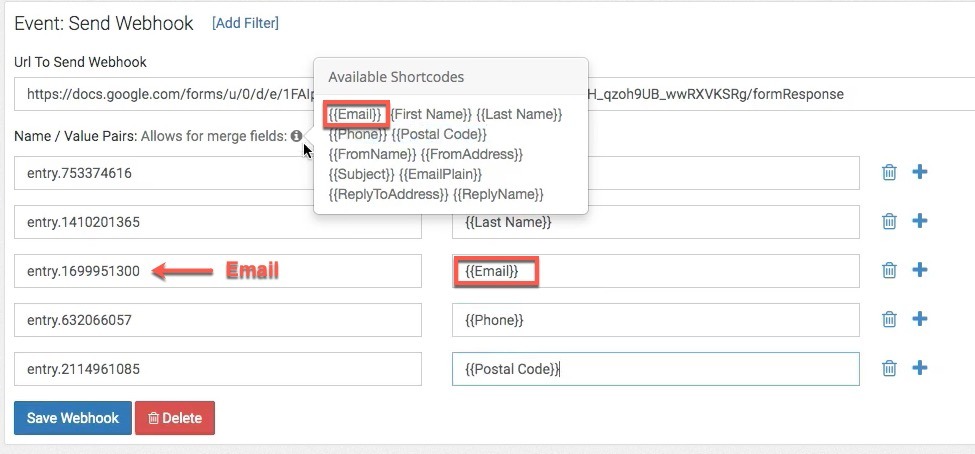
Once you have added all of your Entry IDs, we need to add the merge fields from your parsed email. Click the “i” symbol and copy/paste each merge field next to the corresponding Entry ID.
Once you are all done, select Save Webhook.
Step 5 - Turn It On & Test
Turn on your webhook using the toggle on the right side. Do the same for your email flow by clicking Email Flows in the navigation and using the toggle for your Email Flow.
Click the inbox icon to see the test email you previously sent. It should say SKIPPED because nothing was turned on when you sent the test email. To reprocess this email, select the email by checking the box in the left column and then click Process Selected Emails above. Click Yes if you are given a warning prompt.
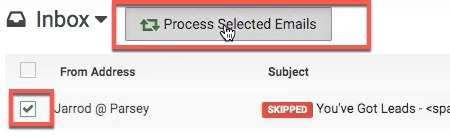
Once this has reprocessed, click the row to see the status. It should say “Success.’ Return to your Google Sheet and verify the data has been received.
You can test this again by sending another transactional email to your Parsey inbox.
Use Parsey to Automate Your Sales & Marketing
By this point you have probably realized that Parsey does a lot more than just send data to Google Sheets. Marketers all over the globe use Parsey to enhance their sales and marketing automation tool. Head over to Parsey.com/Features to see all the ways Parsey can automate more processes to save you time and money.