There are two ways that you can split test using Parsey; In the Campaign Builder and Using an Action Set. Both are covered below.
If you are using an Action Set, do steps 1, 2, and 4.
If you are using the Campaign Builder do steps 1, 3, and 4.
1. Parsey Setup
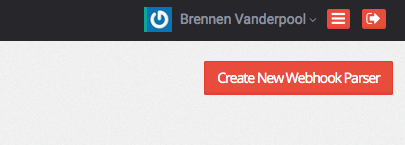
To begin, go to the Webhooks Parser page within your Parsey account. Then click the "Create New Webhook Parser" button.
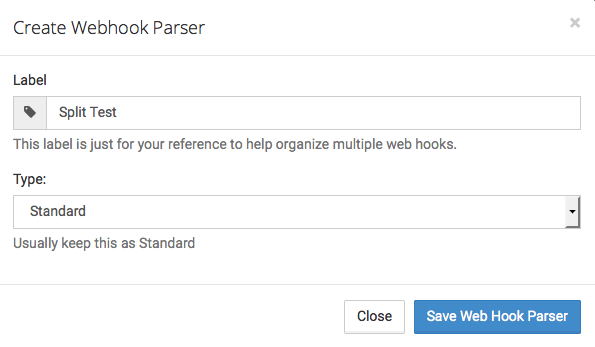
Then give it a label. This can be anything you want. I'll name mine Split Test. Click "Save Web Hook Parser".
Notice the Parser is Yellow. This means it is waiting to receive a webhook. I'll get to that later. Click "copy icon to copy the URL of the Webhook Parser", you'll need it later on.
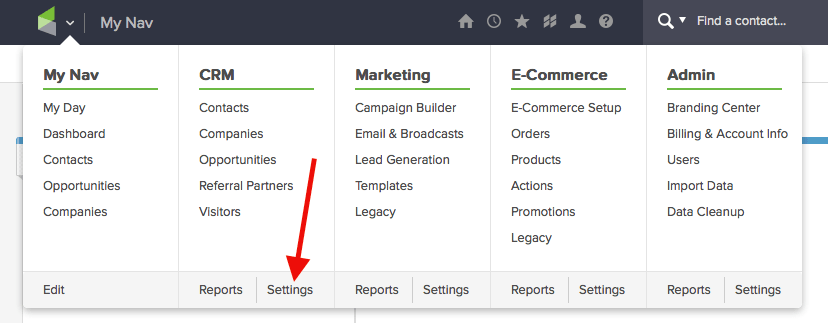
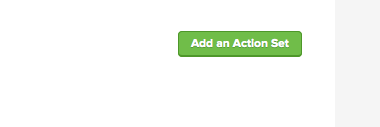
Then click "Action Sets".
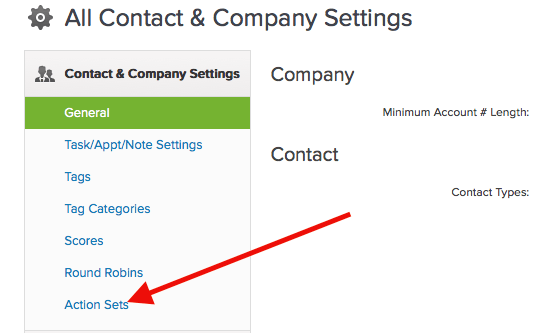
Click on "Add an Action Set".
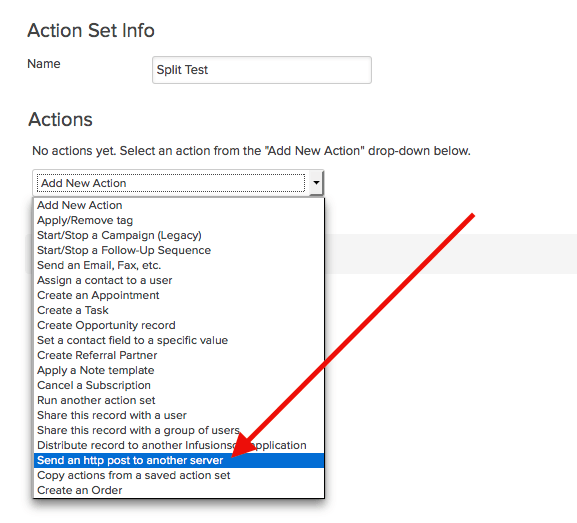
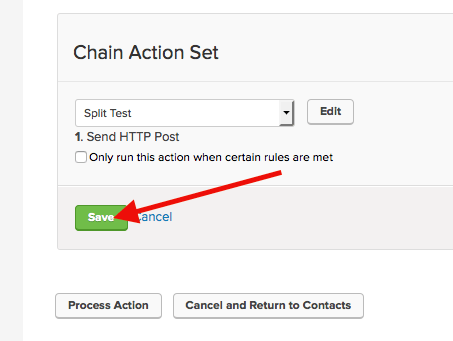
Name it Split Test. Then select "Send an HTTP Post to another server" from the drop down.
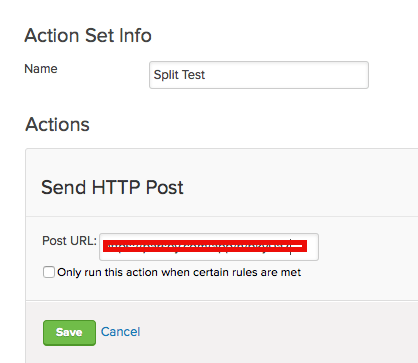
Then input the URL you copied from Parsey earlier and click "Save".
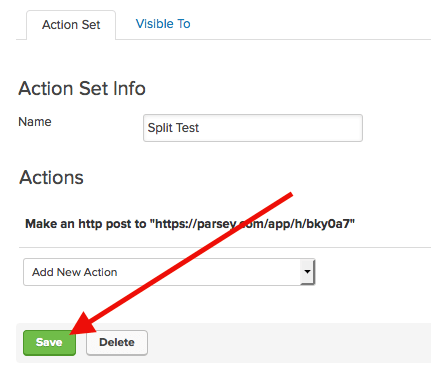
Then click "Save" once more.
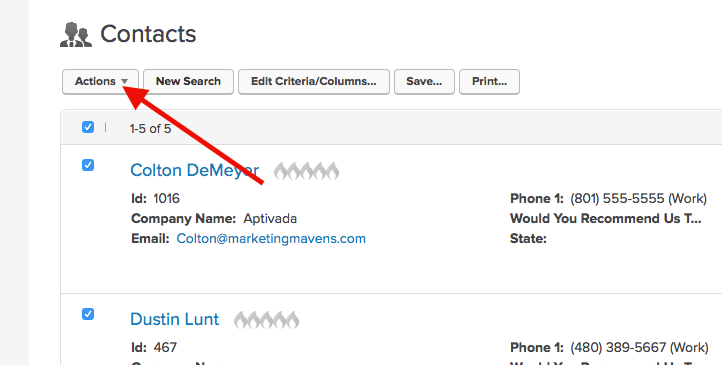
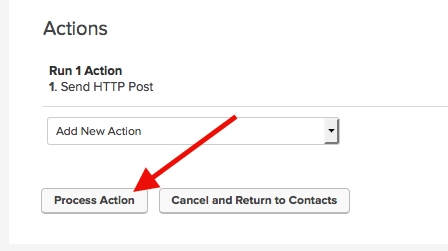
Now do a search for the contacts that you need to split test. Then click "Actions".
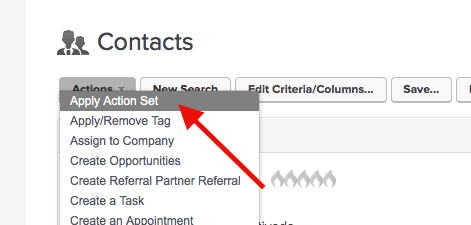
Select "Apply Action Set" from the drop-down.
For the Action, select "Run another action set".
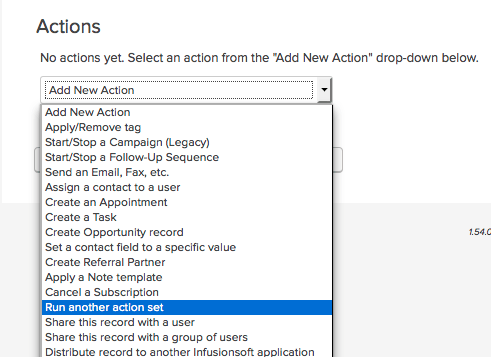
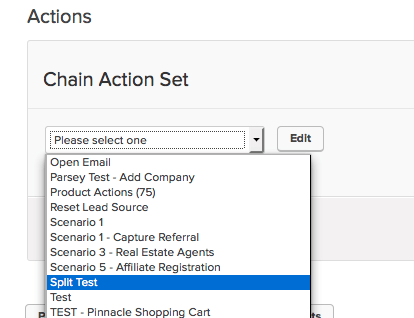
Now select your "Split Test" action set you created earlier.
Then click "Save".
Click "Process Action".
2. Campaign Builder
Inside your campaign, drag a sequence onto the canvas and attach it to the element that you want to trigger the tagging of contacts.
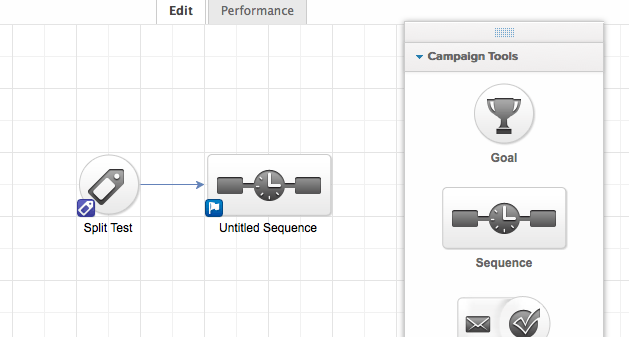
Then, within the sequence, drag an HTTP post Process onto the canvas.
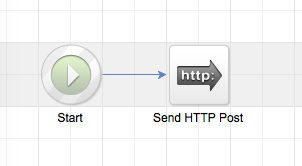
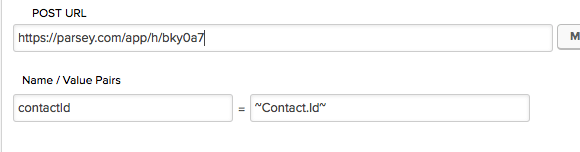
Double click the HTTP Post to configure it. Then add the URL that you copied from Parsey earlier. You can leave the configuration how it is.
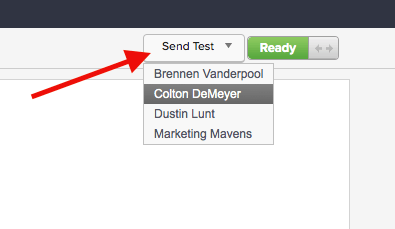
Click "Send Test", and then select a user. This will send an HTTP post to Parsey.
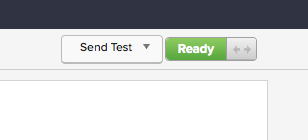
Now mark the HTTP post as ready by clicking "Draft".
Go back to the sequence, and mark that as ready as well.
Now Publish the Campaign.

3. Parsey Configuration
Go back into Parsey. The Parser should now be green.

Click the gear icon and select "Edit Fields" from the popup.

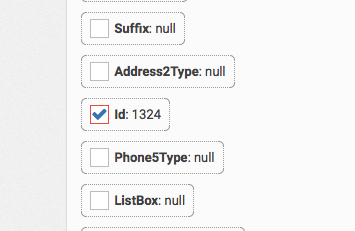
Now select the Id field. This will be ContactId if you used the Campaign Builder.
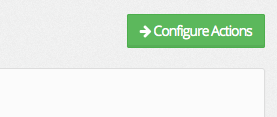
Now click "Configure Actions" at the top of the page.
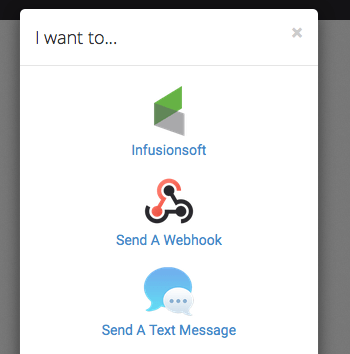
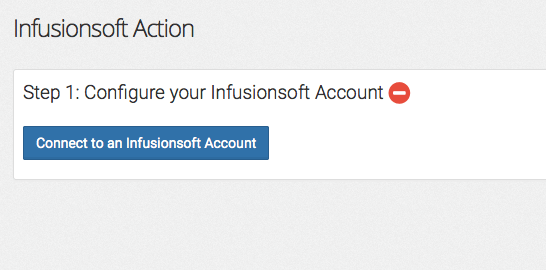
Select "Infusionsoft". Then click "Connect to an Infusionsoft account". If you aren't already connected to an Infusionsoft account, follow this article here.
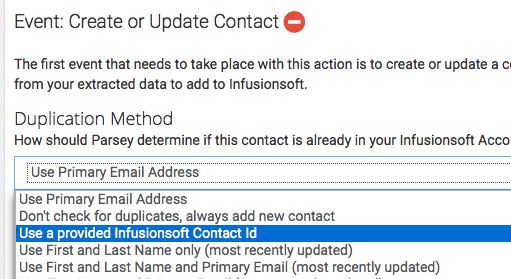
Under the Duplication Method drop-down, select "Use a provided Infusionsoft Contact Id".
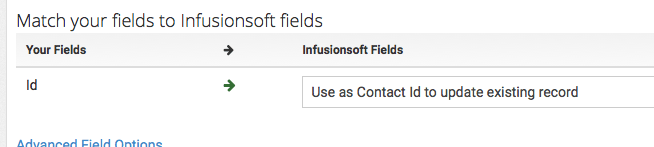
Now set "Id" to "Use as Contact Id to update existing record". This will be ContactId if you used the Campaign Builder. Click "Save".
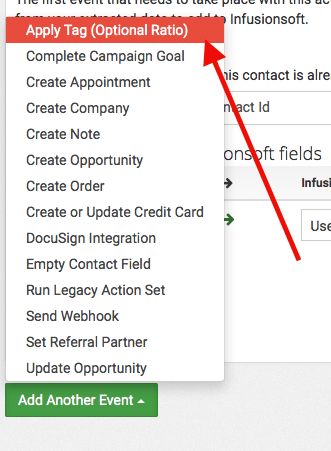
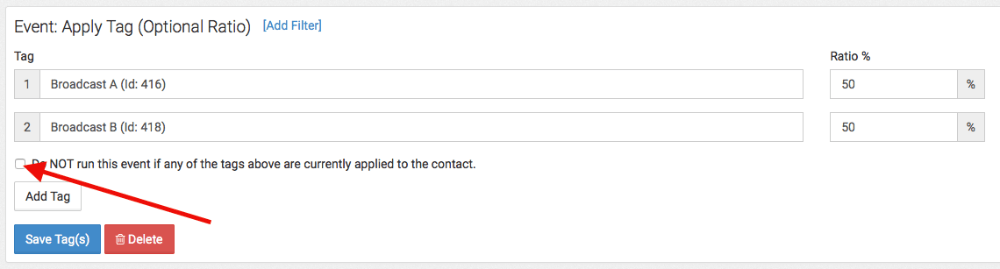
Now click the Green "Add Another Event" button and select "Apply Tag (Optional Ratio)"
Now add both of your Split Test tags to the event. Give them the desired percentages and check the box. Then click "Save".
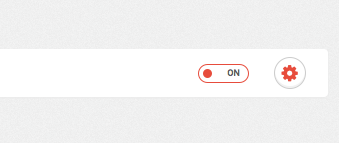
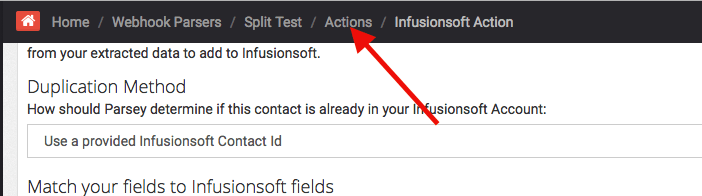
Now click "Actions" at the top of the page.
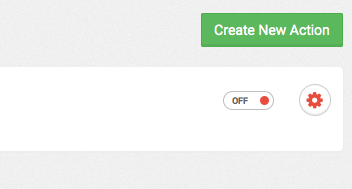
Then turn your Infusionsoft action from OFF to ON.
Now reapply the Split Test Action Set to the same list of contacts or push them through your campaign. They will be tagged according to the ratio set above.